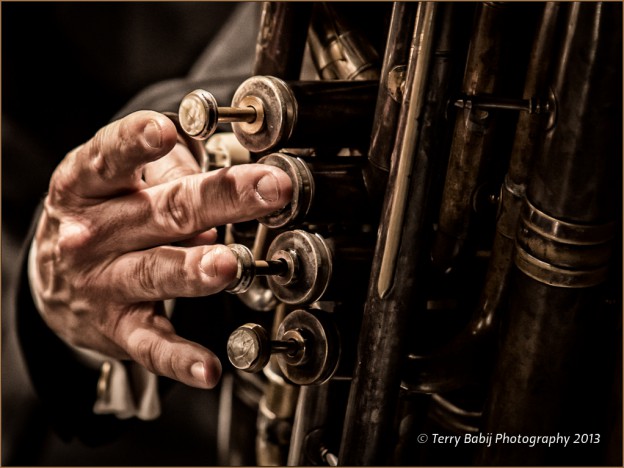

At the January Competition of the Niagara Falls Camera Club our judge selected my Image ” Deep Brass” as “Judge’s Choice” out of all images presented that evening. The image was captured with my Canon 5D MKIII with the 70-200mm 2.8 IS Ver1 lens. Settings: ISO 1600 1/80 sec at f 4.0 200mm hand held IS Mode 1. To the left is the image as captured at the Niagara Symphony Orchestra’s concert on December 15th 2012 at Brock University`s Sean O`Sullivan Theatre
I enjoy concert photography because you have to deal with the lighting on stage that can be harsh and yet dramatic. I challenge myself to find the compositions. We do not have the controls when we work in a studio. One of the great things about newer SLR cameras is the improved low light capabilities and with the MKIII its full frame sensor with more great pixels to work with in post.
My workflow is to bring all my images into the computer with Import as a DNG in Lightroom 4.3. First I Keyword and and apply Standard Lens Correction. I then work with the develop module to non-destructively adjust the image.
Lightroom is great for global adjustments as well as area tweaks using the adjustment brush. I start with Basic White Balance (always checking Auto first because sometimes this gets you real close) then I work the Exposure, Highlights, Shadows, Whites and Blacks. I add in some Clarity and Vibrance most times. With the new 2012 Process, Clarity is far more powerful and it can be pushed more then ever before. Any healing or clones are done in Photoshop because this tool is impossibly slow in Lightroom. Noise is easily removed in the Details Tab. I have been able to produce images for publication from ISO 6400 captures that are well exposed thanks to the new Adobe Camera Raw in Lightroom and the new camera bodies.
I cropped this image in the develop module for composition before editing the balance of the image in Photoshop. When you select “Edit in” from Lightroom the edited image will appear in your Library unless you save as. If you save as you will need to go back to the folder in Library and “Sync Folder” to import the file into your library. The effect in this image is from the “Bleach Bi-pass” filter in nik Color efex Pro 4.0™ now a Google product and finishing touches with a “Make it Glow” process using Luminosity Masks where you actually blur to sharpen. Below is the final Image as projected at Niagara Falls Camera Club’s 5th Critiquing Night January 21st 2012.

Hi Terry, I’ll have to quit working on FBand take a full-time job of reading your blog! I’m glad I contacted you and thank you for taking the time to share your knowledge.
Glad to help.I try to post when I have something valuable to say. Keep in touch!